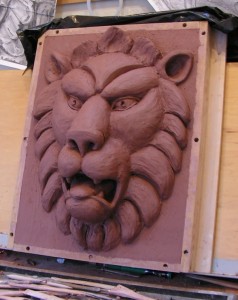
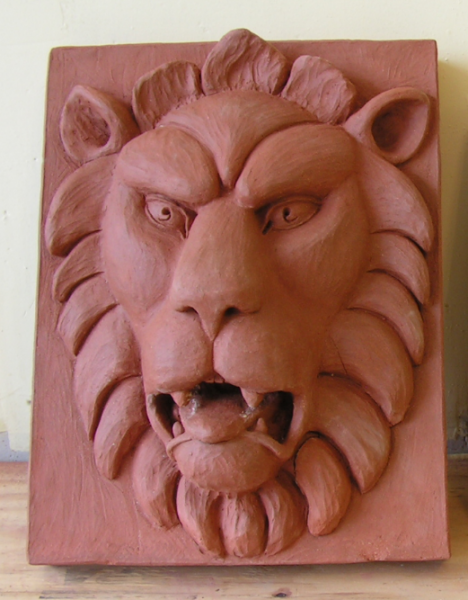
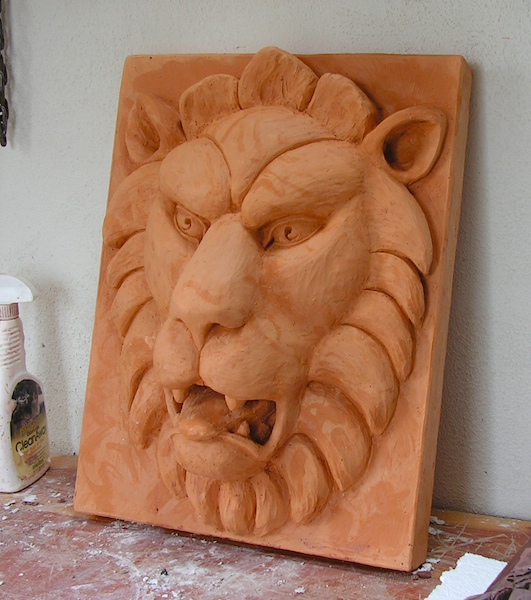
After another 3-4 hours work this evening I came to the last square inch on this model and now it’s finished!
There will be a little more final cleaning up on it to do yet as it dries out.
The clay is Continental course red clay with grog.

Terracotta & Cast Stone Gargoyles, Keystones, Sullivanesque, Custom Commissions By Wolff
After another 3-4 hours work this evening I came to the last square inch on this model and now it’s finished!
There will be a little more final cleaning up on it to do yet as it dries out.
The clay is Continental course red clay with grog.
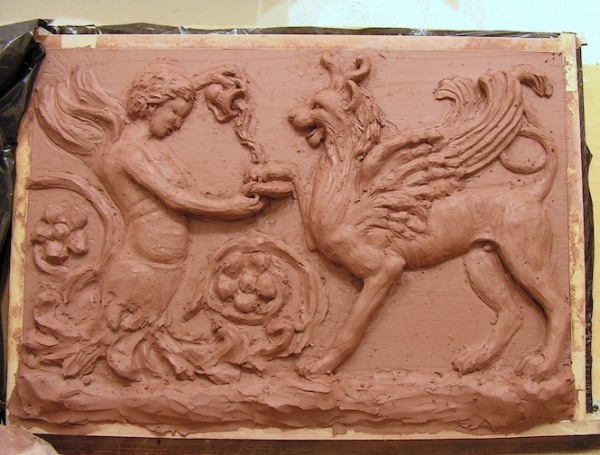
I finally got back to this after letting it sit a while, it’s now kind of leather hard so I need to get the finishing done quickly.
All the work I did today was on just the winged lion, hopefully tomorrow I can finish his front paws and get a substantial amount done on the other half.


In this video I show the new wolf head mold and how it works, but I also show a soon to be discarded mold of the other material I used to use and anyone can see how easily it tears like paper even when it’s a good 1/4″ thick. I only got 16 casts out of the first wolf head mold before the section in and around the mouth tore badly enough it was unusable.
And in this one I show the current model in progress “Roman Ruins”
Just finished pouring the 5th section- the base for this mold and it can come apart in a half hour or hour.
It took a box 16″ square and 5-1/4″ deep to fill it high enough to cover his nose by about one inch.
I also ordered some slip to try out, it was a real pain trying to find what I wanted, and then when I did, I found they can’t ship those 2 gallon boxes via UPS. A couple of places can ship one gallon slip containers but one place had a $26 price plus UPS for one gallon.
As I know it took one gallon of rubber to cast the sculpture, I’ll need to have a couple of gallons of slip as one isn’t enough.
I was going to look into mixing my own but then by the time I bought a 50# bag, plus the UPS, chemicals needed I read the instructions on mixing it said to mix for 2-3 hours with the mixer so I guess mixing it in the 5 gallon pail with a jiffy mixer and drill isn’t going to work, so I found my normal outlet has slip but the UPSable size is 5 gallons, about $26 for the slip and $40 for the shipping and ordered that even though I strongly dislike paying almost twice what a product costs to buy just to get it shipped to me! I don’t have the equipment to mess with mixing batches of dry slip.

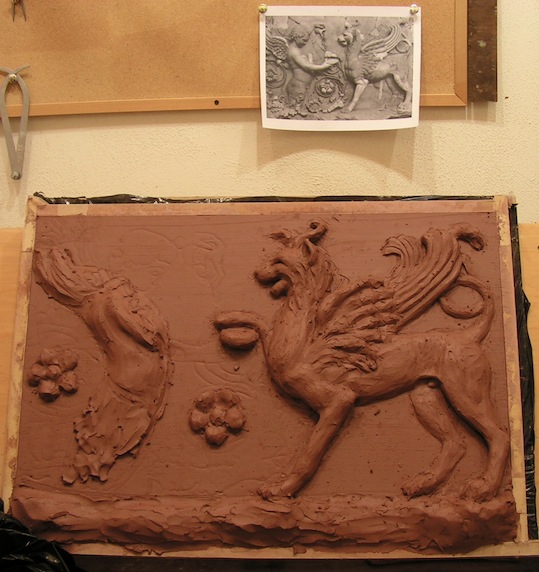
I haven’t worked on this much this last week as I’m on vacation from work, and I also spent a couple or three days repointing the brickwork on my gallery building, but it’s making progress. The puttis’ hands were not easy, I worked on those and his face yesterday, and today mostly two of the lion’s paws that were only roughed out.

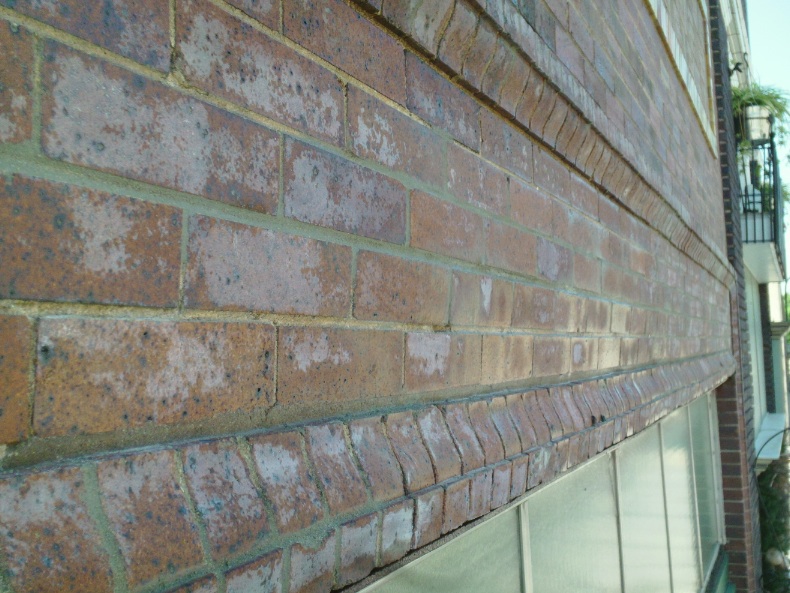
I finally had time this week to set about repointing the brick on my gallery building, the weather was just perfect, warm, nice breeze, low humidity and sunny. I had to rust treat the exposed steel I beam flange, prime and paint it first, then I began work on the mortar repointing. It’s just another of those periodic kinds of maintenance things I have to stop work on other projects to do.
Most of the facade is good, it was just a couple of courses of brick all the way across where the mortar was like sugar an inch in, obviously that had been repointed very poorly.
After I finished repointing I needed to caulk some gaps between the steel flange and the lowest course of brick and it’s done.
Here’s some pictures during work:


This coming Saturday and Sunday the 29th and 30th of June will be the first time my physical gallery-museum building is open to the general public. It still needs more work done but progress is being made.
I am officially on vacation to Monday July 9th.
The winged lion and putti model I haven’t had time to work on the last couple of days, and it needs to firm up a bit more anyway.
I submitted materials and the fee to the National Sculpture Society so I can have my work displayed in their sculptor’s gallery on the NSS web site: http://www.nationalsculpture.org
Founded in 1893 in part by sculptor Augustus Saint Gaudens, architect Stanford White and sculptor J.Q.A. Ward- those three names are among my very favorites.

Progress for today so far.
I started the model this afternoon and after forming the flat slab, no tools have been used yet to this stage, just fingertips and fingernails.
I have to wait on a couple of details which will likely be placed temporarily and then replaced when the model is alomst done- the lion’s horn and the putto’s arm, both of which extend out to full round and would dry out too quickly if done at this point.
The lion’s outward legs are also full round but have a little more mass to them, they are attached but undercut deeply, they may be changed a little or just undercut more.
The lion’s chest needs to be reduced a bit and his abdomen built up a little to make him look a little less long bodied.
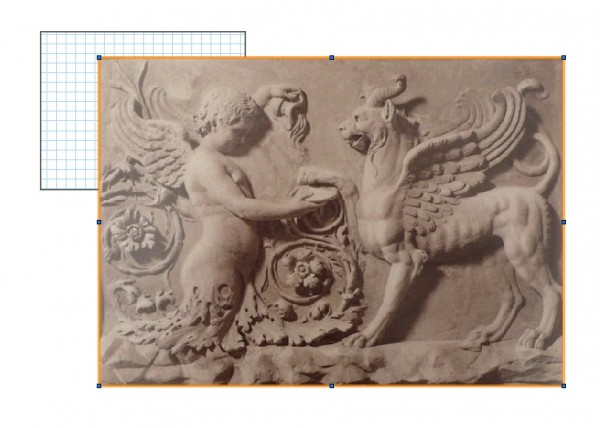
I pretty much all but decided to try a model of this ancient Roman fragment, and I’m leaning towards 17″ x 24″ or there abouts.
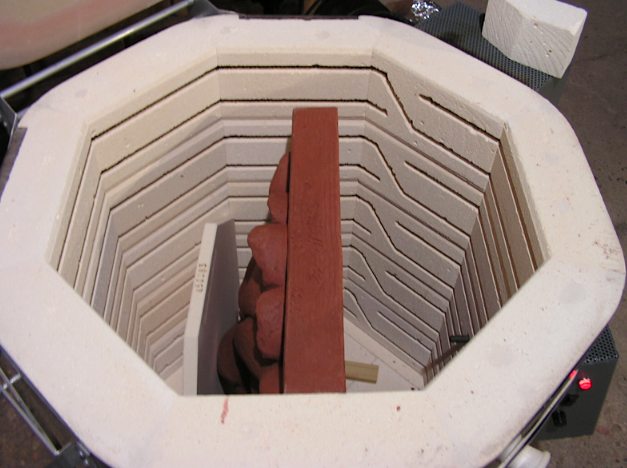
The firing is finished, 33-1/4 hours and here’s the lion in the kiln as I had it, the only way it would fit and the shelf set in on edge was necessary to keep him from falling forward, it worked perfectly and did not mar or discolor the clay at all where there was contact.
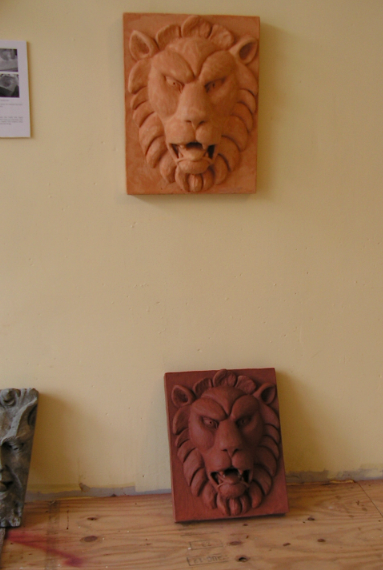
The clay fired model on the floor below a cast from the mold which was made of the damp clay model. There is about a 2″ shrinkage which can be seen easily, and it also shows somewhat why I made the mold while the clay was still most- to retain most of the size.
With the original model completely dried out yesterday, I decided to go ahead and fire him in the kiln, so last night I programmed a new sequence with longer/slower heating rates, giving the model 9 hours @ 195º to make sure it’s good and dry all the way through, and then essentially rise about 75º an hour for a segment, and 80º for the last segment to 2046º which will make it 33-1/4 hours total. It’s a large heavy model so this should work fine.
At the moment I have the dry green model in the kiln at the gallery cooking away. I just about fit in the kiln, it’s a large piece, hopefully with the longer firing time it will do fine.
I set it to go up 50º an hour to 195º and then hold it for 6 hours to make sure it’s good and dry and warmed up, that should take about 9 hours total.
Then it goes up 75º an hour to 400º and holds it for 15 minutes.
Then 75º an hour to 1300º
Then 80º an hour to cone 01 (2046º)
Hold for 15 minutes.
I had fine results with a faster firing on all the other pieces this size except for the one made of raku clay- it blew out by 400 degrees depite being dry for over a year.
The rest of the pieces were Georgies Three Finger Jack clay, with 2 pieces being Continental course red with grog.
None of them cracked.
The lion is sitting upright as it’s the only way it can fit, and it’s forward heavy so I needed to set a kiln shelf in on edge for it to lightly lean against and stay vertical, not the best solution but it should be fine.
Now after I eat I need to head over and check the kiln and see that it’s right about 195º and working properly. It should be around 500º about the time I head for work so I might check and see.
I recently had an inquiry from someone asking if I had ever done a horse head before, and the gentleman sent a photo of what he had in mind. I tracked the original version back to the main page on the Library of Congress web site to get the large version and info:

I figured the piece is about 20-22″ tall but the gentleman had mentioned wanting one “much smaller” though to me 20″ is not very large at all.
The big issue is the fragile ears, one is broken and the other looks like it was patched at one point on this likely terracotta piece, it’s not a practical design to do in plaster or concrete, it’s more suited for bronze or cast iron unless the mane is creatively re-done to lend support to the ears.
I went looking for pics on my drive as I know I had some, I found I did have a couple of photos of others, and tracked one back to an address of a former stable in NYC to look up in Google street view. I also discovered I had two other views of another one made of red clay of a salvaged piece sitting in the Brooklyn Museums’ sculpture garden in the fenced off area where a large quantity of architectural sculptures were just dumped there to store them.
I concluded they were made by the same firm, so as a result I have at least three different views, and could probably find more with a little work.
I think I’ll add it to my list of models to do.
Really poor pic from street view of a former stable in NYC, either typical white terracotta or painted white.

The red terracotta version.

Now with the model finished, and the mold of him finished as well, here is the first cast of the lion:
Last shot for now, the clay will need to firm up somewhat before I do more to it, still pretty sticky and soft since I just opened the packages yesterday.
It took exactly 100# of clay, I have about one softball sized piece left of the packages I opened for this model.